Easy Shrek Drawing
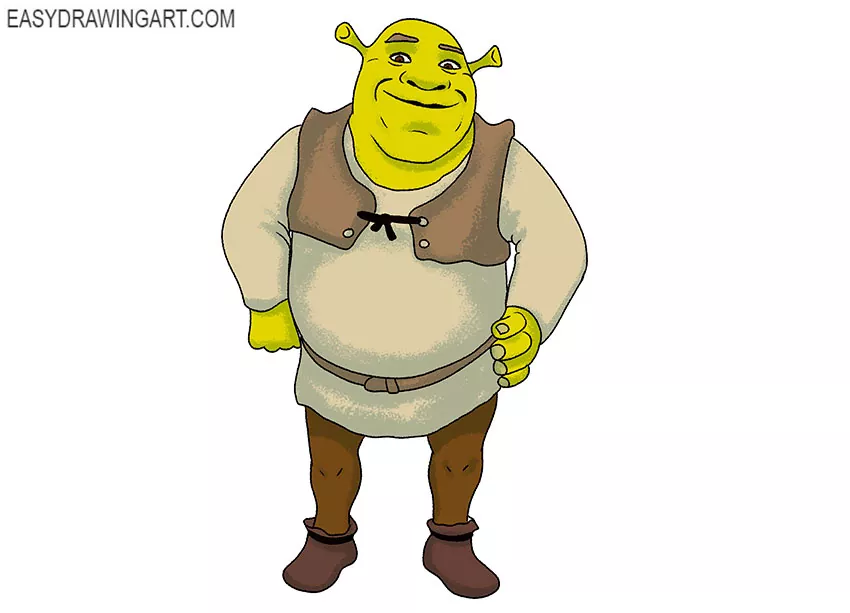
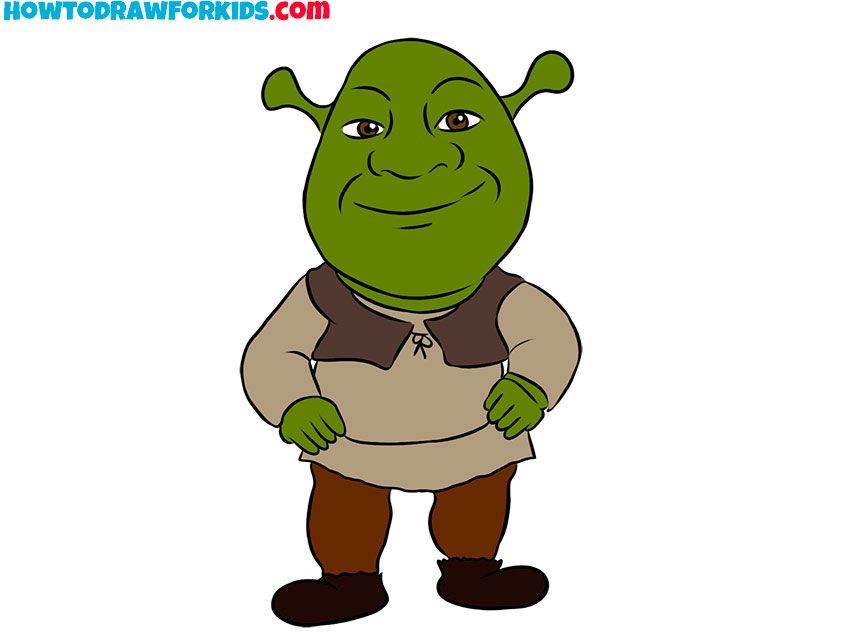
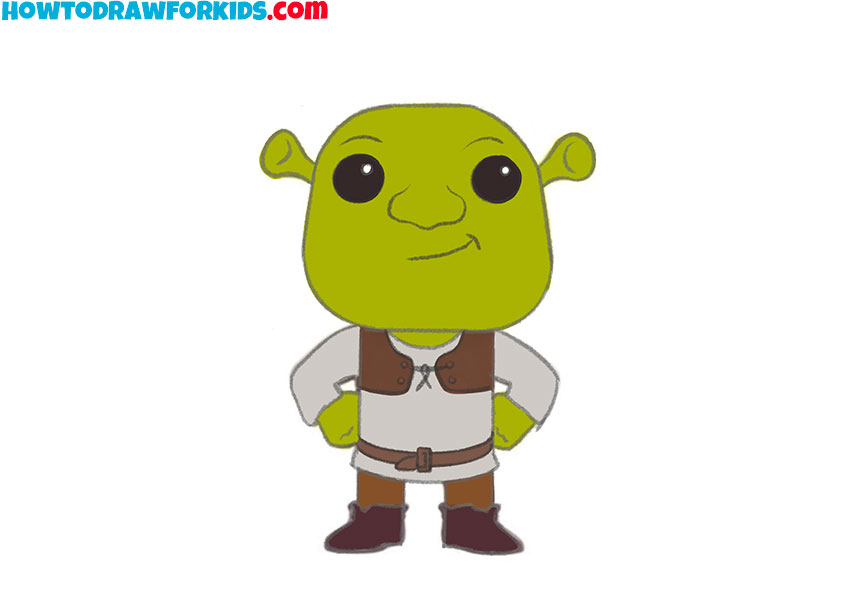
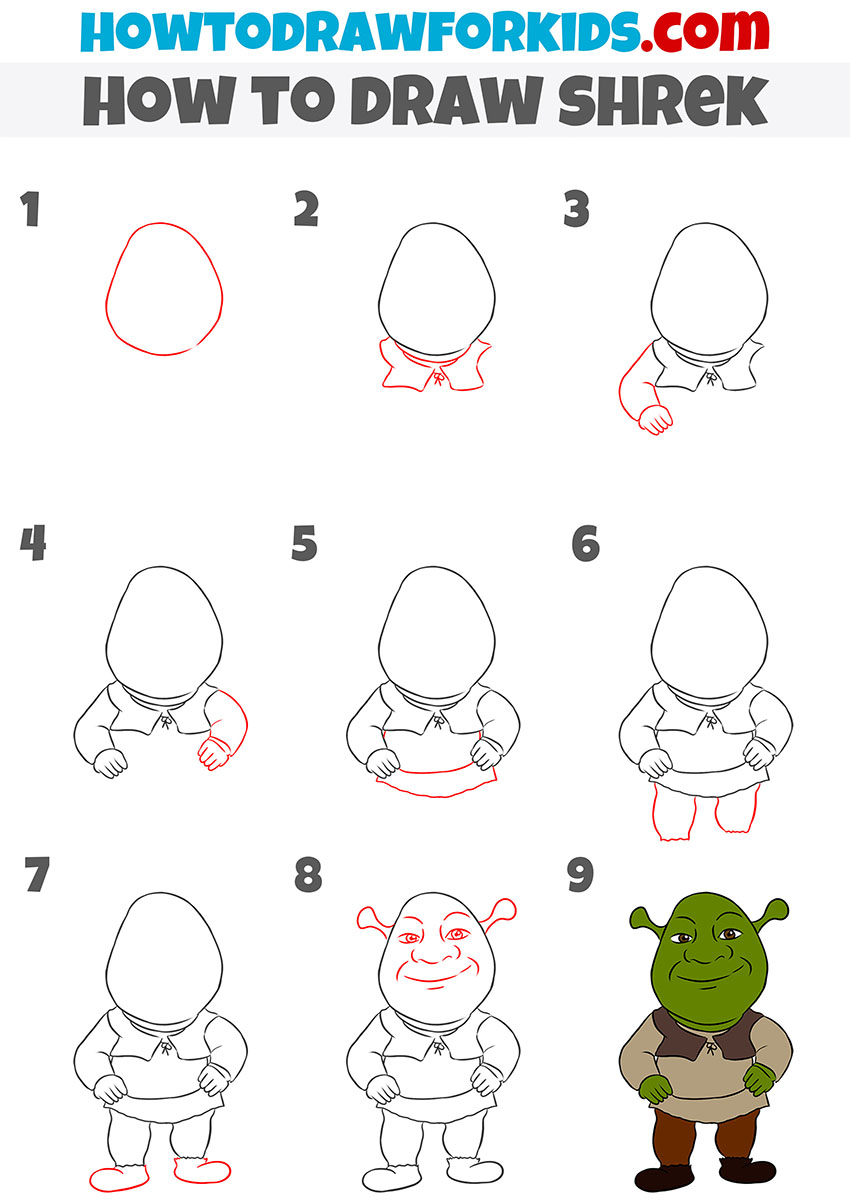
Easy Shrek Drawing - When drawing shrek’s large eyes, start by sketching two oval shapes with a slight tilt towards each other. Initiating the first 2 steps with this shade provides a basic scaffold. These ovals will serve as the base for his eyes. So, kids, pick up your green, brown, tan, and white colors for this easy shrek drawing. You may also wish to color your finished drawing. Web learn how to draw shrek.welcome to the cartooning club channel, the ultimate destination for all your drawing needs! Draw the folds as large dots. You now have a finished inked drawing of shrek! By following the simple steps, you too can easily draw a perfect shrek. Web our shrek drawing is complete, and it is ready for coloring. Web follow along as i draw shrek! Next, add in the iris and pupil, making sure to leave a small highlight in the pupil to give the eyes a lively appearance. Draw shrek's nose using the initial oval as a guide. How to draw a great looking shrek for kids and. This step inspires and motivates kids as they get excited about coloring. Follow these easy instructions to bring your favorite ogre to life and unleash your artistic skills. In this tutorial, we'll show you simple techniques to create a perfect shrek drawing, whether you'r. If you like this tutorial please like and share! Web 👋welcome to my channel!🖌in each video, i guide you through the drawing process step by step.⚠️i'd like to mention that my videos feature animated tutorials. Please leave it in the comments below. Draw the head, thoracic region and pelvis in the form of figures of various shapes. Darken the top and the bottom. Whether you like shrek or not, you will love completing a fun drawing and learning how to draw shrek from scratch. Web 👋welcome to my channel!🖌in each video, i guide you through the drawing process step by step.⚠️i'd like. When drawing shrek’s large eyes, start by sketching two oval shapes with a slight tilt towards each other. This guide unfolds over 16 steps, with each step aiming to provide clarity and ease. Initiating the first 2 steps with this shade provides a basic scaffold. Next, add in the iris and pupil, making sure to leave a small highlight in. There are 12 steps in the lesson, and you can pause it at any point if you want to draw along. How to draw a great looking shrek for kids and. Use the initial shapes as guides to draw shrek's ears. Start with a large oval shape with cross sections. Web adding facial features to shrek drawing shrek’s large eyes. You have completed your drawing of shrek, and he looks as lovable and grumpy as ever. How to draw a great looking shrek for kids and. When drawing shrek’s large eyes, start by sketching two oval shapes with a slight tilt towards each other. Just draw around the outer part of the circles and thicken up the lines to make. Whether you're a beginner or an experien. Web 👋welcome to my channel!🖌in each video, i guide you through the drawing process step by step.⚠️i'd like to mention that my videos feature animated tutorials. Start with a large oval shape with cross sections. This guide unfolds over 16 steps, with each step aiming to provide clarity and ease. In this tutorial,. So, kids, this tutorial about how to draw shrek will benefit you. Depict the belly and the bottom of the. You might also like our other shrek drawing lessons. How to draw shrek from shrek with easy step by step drawing tutorial. Web follow along as i draw shrek! Please leave it in the comments below. If you like this tutorial please like and share! Web learn how to draw shrek.welcome to the cartooning club channel, the ultimate destination for all your drawing needs! Draw a short vest below the head. If you have any feedback. Draw the arm on the right side in the same position. Draw the folds as large dots. Begin by drawing a circle. Using one smooth line, mark the central axis of the body. Draw a large and fat rectangle for his body. You might also like our other shrek drawing lessons. Whether you like shrek or not, you will love completing a fun drawing and learning how to draw shrek from scratch. Above each eye, draw shrek's thick eyebrows. Darken the top and the bottom. Your final drawing should look like the sketch on the right. Web 👋welcome to my channel!🖌in each video, i guide you through the drawing process step by step.⚠️i'd like to mention that my videos feature animated tutorials. All you will need is a sheet of paper, a pencil, and an eraser. Use the initial shapes as guides to draw shrek's ears. Next, add in the iris and pupil, making sure to. How to draw shrek from shrek with easy step by step drawing tutorial. So, kids, pick up your green, brown, tan, and white colors for this easy shrek drawing. Draw a few lines around shrek's eyes for extra detail. Use the initial egg shape as a guide to draw the rest of shrek's head. There are 12 steps in the lesson, and you can pause it at any point if you want to draw along. Just draw around the outer part of the circles and thicken up the lines to make the base. Your final drawing should look like the sketch on the right. Web how to draw shrek. All you will need is a sheet of paper, a pencil, and an eraser. Web drawing shrek requires understanding a set pattern. Web follow along as i draw shrek! On the left side draw the short arm that is slightly bent at the elbow. Web learn how to draw shrek.welcome to the cartooning club channel, the ultimate destination for all your drawing needs! You too can easily draw shrek following the simple steps. Draw a short vest below the head. Web adding facial features to shrek drawing shrek’s large eyes.
🟢 Cómo dibujar el ROSTRO de SHREK fácil paso a paso how to draw SHREK

How to Draw Shrek Really Easy Drawing Tutorial

How To Draw Shrek Easy, Step by Step, Drawing Guide, by Dawn DragoArt
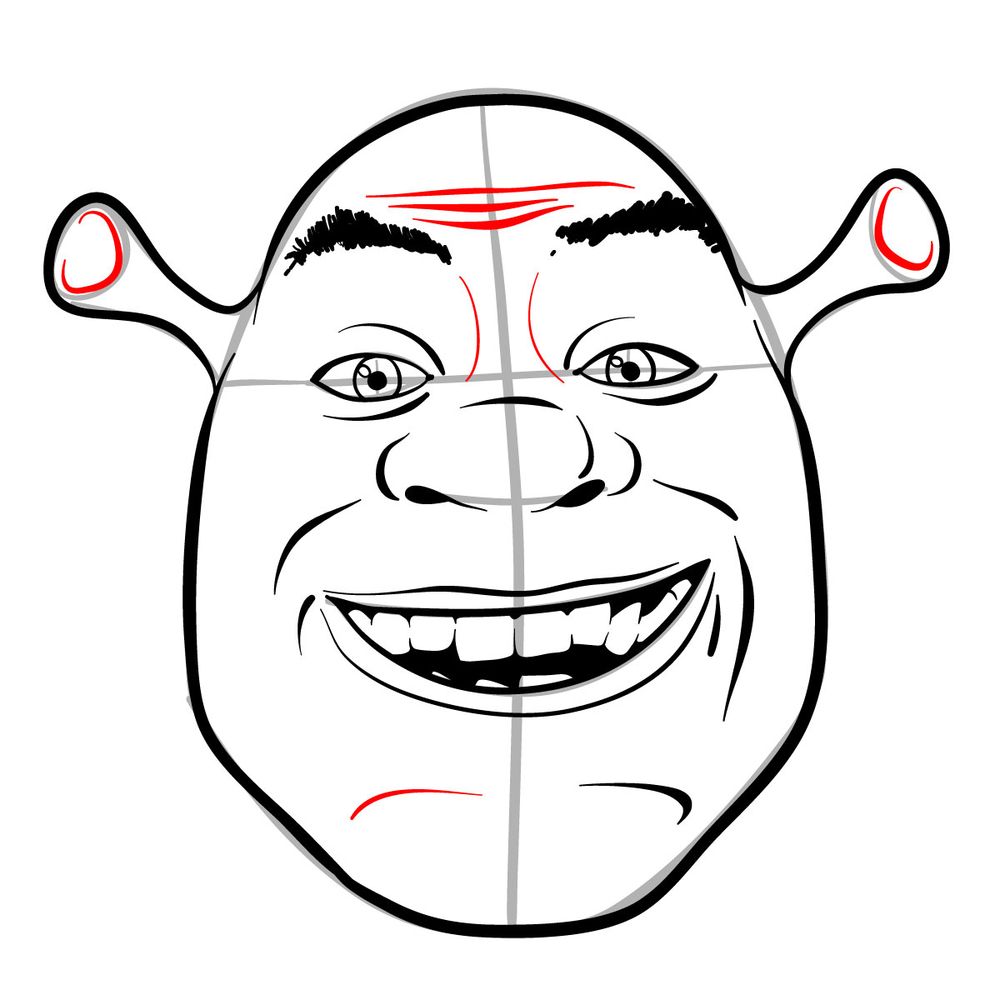
Shrek Face Drawing
How to Draw Shrek Easy Drawing Art

How to Draw Shrek Really Easy Drawing Tutorial
How to Draw Shrek Easy Drawing Tutorial For Kids
How to Draw Easy Shrek Easy Drawing Tutorial For Kids
How to Draw Shrek Easy Drawing Tutorial For Kids
How to Draw Shrek from Shrek with Easy Step by Step Drawing Tutorial
Initiating The First 2 Steps With This Shade Provides A Basic Scaffold.
Use Thin Lines To Define The Position Of The Arms And Legs.
Using One Smooth Line, Mark The Central Axis Of The Body.
Depict The Belly And The Bottom Of The.
Related Post: